 In a recent blog, we discussed automating the deployment of 6WIND’s vRouter on bare-metal machines. We started this post by advertising the possibility to “deploy 6WIND vRouter images very efficiently” in virtualized environments.
Today, we will highlight vRouter deployments in one of these virtualized environments: Amazon Web Services (AWS). You will realize that it is, indeed, a very simple task.
Note: The reader should be familiar with cloud techniques in general, and know-how to set up AWS networks for public access. If this is not the case, refer to this AWS doc.
Run a Virtual Machine (VM) on AWS – Amazon Web Services
Two settings are required to run a VM Instance on AWS :
- AMI image : the bootable image to run, delivered as a private AMI image to AWS users.
- Instance type : the virtual hardware of the VM (vCPUs, RAM, Storage, Network interface).
Choose an appropriate Instance type for 6WIND vRouter
AWS provides different categories of Instances depending on the intended use (see detailed Instance types). The chosen Instance type defines hardware parameters that are key to vRouter functionality and performance :
- Minimum 2 vCPUs are required.
- Minimum 8 GB RAM is recommended to start with the default scaling parameters. However, it is possible to tune down these parameters to reduce the required RAM to 4GB.
- Network Interfaces MUST be either Intel 82599 Virtual Function (VF) or Elastic Network Adapter (ENA) interfaces (see Enhanced Networking).
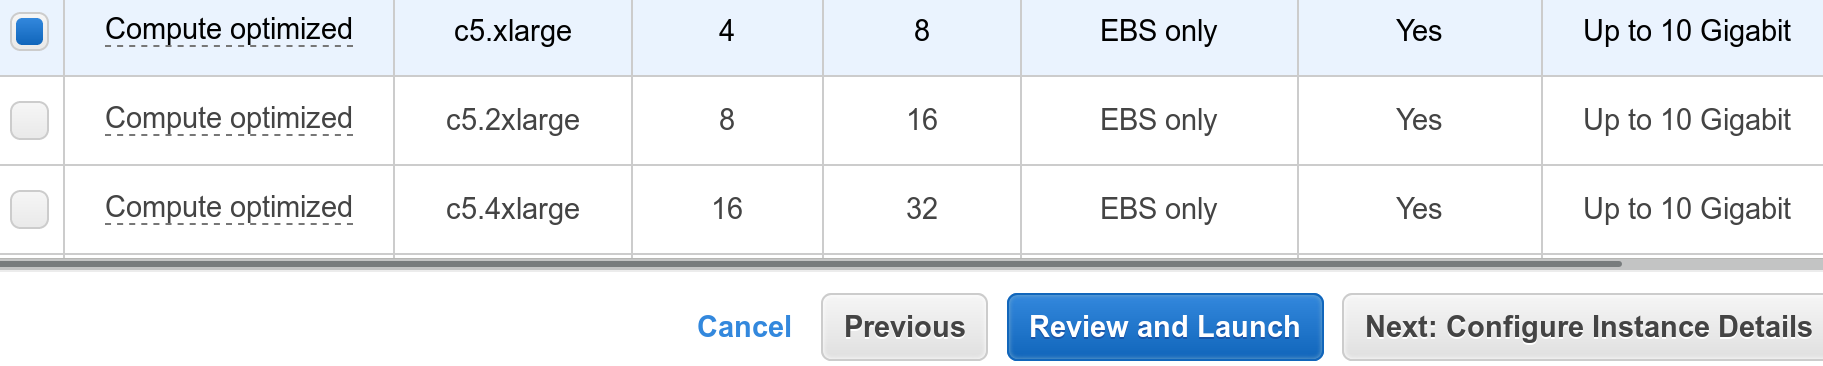
To get the most out of 6WIND vRouter, it is advised to use a Compute-Optimized Instance.
Run a vRouter Instance
With an AMI image in one hand and an appropriate Instance type in the other, it is now trivial to deploy a vRouter Instance on AWS.
The vRouter includes default cloud-init scripts that start an SSH server and configure the first interface using DHCP. This is what we call the “Day-1 config”, which allows you to connect to 6WIND vRouter via SSH without any manual configuration. This configuration can be customized by providing a cloud-init script to the new Instance (see details below).
From Web console :
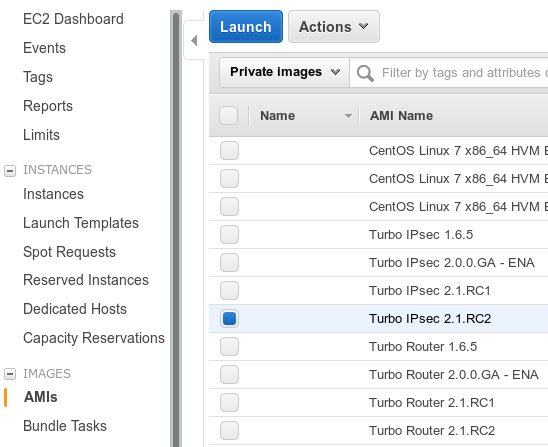
- In the Amazon EC2 Management Console, in the ‘AMIs’ panel, select your vRouter AMI, then click on ‘Launch’.
- Select an Instance type, then ‘Next: Configure Instance Details’.
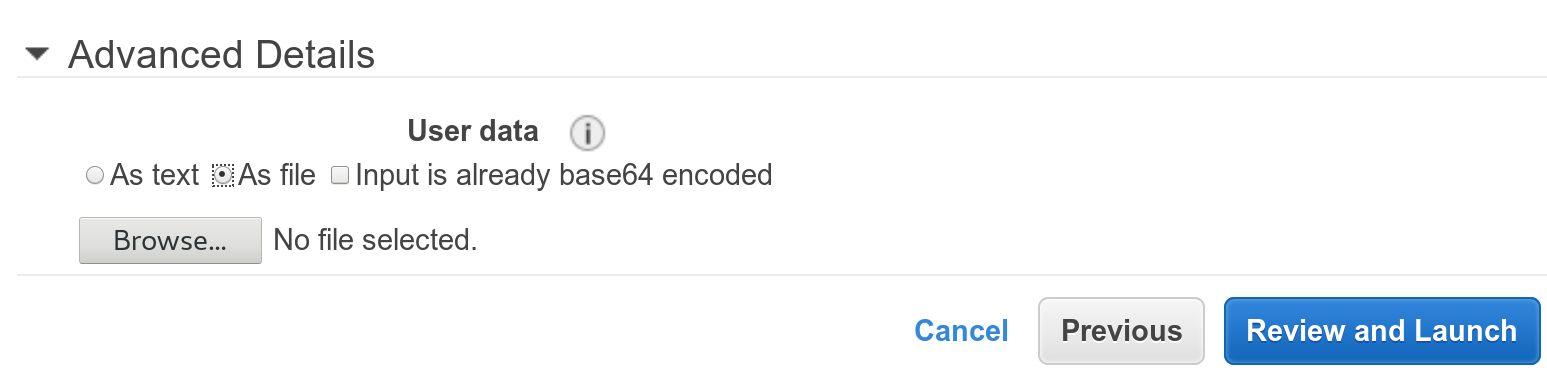
Here, in ‘Advanced Details’, attach your cloud-init file or copy its content. Finally, ‘Review and Launch’ > ‘Launch’.
From AWS CLI :
- “aws ec2 run-instances –image-id <AMI_ID> –instance-type c5.xlarge –user-data file://cloud-init”
Configure the vRouter Instance
Access the new Instance
By default, a new AWS Instance has a single interface with a private IP address, which is NATed to a random public IP address chosen by Amazon Web Services. Make sure that the interface uses a security group that allows Inbound SSH traffic, before using that public IP address to access the vRouter.
Day-1 configuration
When creating an Instance, providing a cloud-init script allows you to customize your Day-1 configuration. This is useful to automatically deploy a startup configuration.
Below is an example cloud-init script that creates a license file to be loaded on boot, and a Day-1 CLI configuration that enables 6WIND’s fast path[1] on the first interface, and changes the admin password:
#cloud-config
write_files:
- path: /etc/sysrepo/data/vrouter.startup
 content: |
   {
     "vrouter:config": {
       "vrf": [
         {
           "name": "main",
           "vrouter-interface:interface": {
             "physical": [
               {
                 "name": "pub1",
                 "port": "pci-b0s5",
                 "ipv4": {
                   "dhcp": {
                     "enabled": true
                   }
                 }
               }
             ]
           }
         }
       ],
       "vrouter-system:system": {
         "vrouter-fast-path:fast-path": {
           "port": [
             "pci-b0s5"
           ],
           "advanced": {
             "vlan-strip": true
           }
         }
         "vrouter-auth:auth": {
           "user": [
             {
               "name": "admin",
               "role": "admin",
               "password": "$5$tE37CYPoSgv$yVLCPlumrTUiTuRJkIhwUyQn.EuCmRhsBpueoYycP5C"
             }
           ]
         }
       }
     }
   }
About the above configuration:
- The interface must be configured with DHCP.
- Enabling 6WIND’s fast path in AWS requires you to also enable the vlan-strip option.
- A user’s password can be defined using a hash resulting from the following command:
“mkpasswd -m SHA-256”
Manual Configuration
Once the Instance is running and accessible, you can start configuring it manually. For example, if you did not apply a startup configuration using cloud-init, you could do something equivalent.
Enable the fast path1 on the interface :
ip-10-0-0-61> edit running

ip-10-0-0-61 running config# system fast-path

ip-10-0-0-61 running fast-path# port pci-b0s5
In order for the fast path to handle traffic from AWS, it is required to enable VLAN stripping :
ip-10-0-0-61 running fast-path# advanced vlan-strip true
Finally, commit the configuration :
ip-10-0-0-61 running fast-path# commit
Go Further With AWS
There are many ways you can use 6WIND’s vRouter inside the cloud. For example, you could virtualize your company’s infrastructure on private subnets, and use the vRouter as the border router and firewall, providing Internet access from/to your internal machines.
Contact us today and receive your access to a vRouter private AMI. Get creative and design your own cloud services!
This article was written by Simon Ravier from 6WIND’s Support Team.
[1] The fast path is the vRouter component in charge of packet processing.